
Mr. Schoonover kindly sent us these photos of the Weekender completed recently. We thought that his letter did such a nice job of describing these great shots, we should pass it along! Mr. Schoonover mentions that he had some wood working experience prior to starting his Weekender project. I should think so: We've never seen a Weekender with hand carved scallop shell details before (and nicely done too)! Now that he has finished his Weekender, Mr. Schoonover has voluteered to act as treasurer for the new BYYB Weekender Builder's Association, and as a Builder Contact Program participant for Indiana.
Well done Joe!
October 12, 1999
Dear Mike and Peter,
I have enclosed photos of my recently completed Weekender. I want to thank you for what has so far been a very enjoyable experience. I have yet to get her in the water due to the fact that my days off and the weather don't seem to be able to get together, but I hope to get in a few good weekends of sailing before the weather turns too cold. I also hope to eventually get some good pictures under sail and when I do I'll pass them along.
In terms of the building experience itself, I entered into the project with very little knowledge of boats but quite a bit of experience in woodworking. I started the project on June l9th, 1999 and finished on October 7th, 1999. In between I spent approximately 210 hours on the construction, finish, and rigging. My total cost of materials was approximately $2200 but if you add in incidentals such as shipping costs, disposable paint brushes, sandpaper, etc, then the total cost of construction was closer to $2500. I used marine grade plywood throughout, stainless steel screws, mahogany and white oak for most of the trim, and epoxy as the resin of choice. The paint is Petit's Easypoxy, the blocks are Harken, and the lines are all double braid from West Marine.
Here is a key to the photos which I've numbered on the back. I'll try to comment on
some of the things visible in each photo.

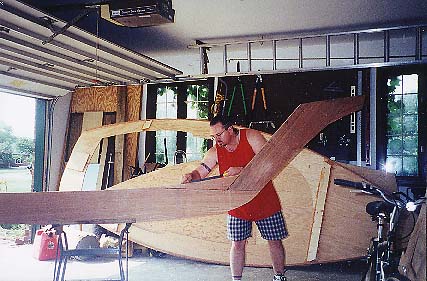
#1. I've laid the keel and have made my first plywood cuts. The "crew" stands by, anxious to get sailing.
#2. Deck in the background. Shaping the keel. First chance to start feeling like a real boat builder.
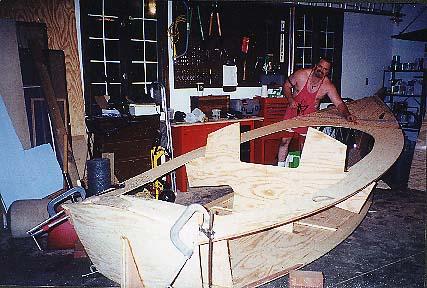
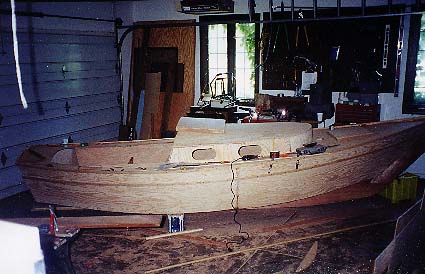
#3. Starting to take shape!
#4. Even more boat-like.
#5. I look at this photo and wish I had painted everything at this stage. It would have been much easier.
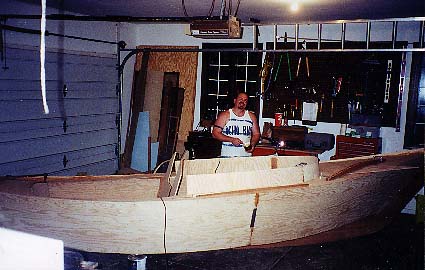
#6. A little further along.
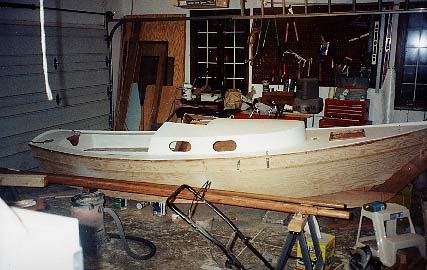
#7. Topside has a coat of primer. At this stage the boat had never been turned over.

#8. Like a turtle on its back. My wife and I rolled it over onto some padding by ourselves. This photo was taken after glass/epoxy and a coat of Easypoxy white undercoater.
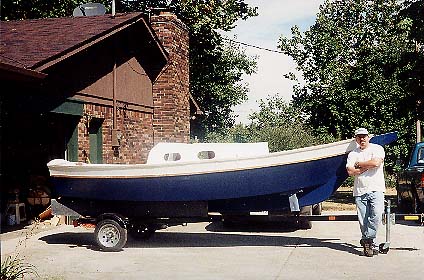
#9. Rightside up and on the trailer! I bribed 7 of my co-workers with a free lunch to come over at lunch time and help me flip it rightside up and onto the trailer.
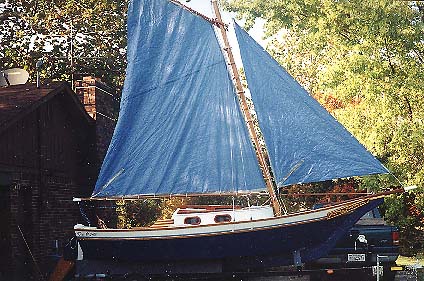
#10 Tina Louise-rigged and ready to go!

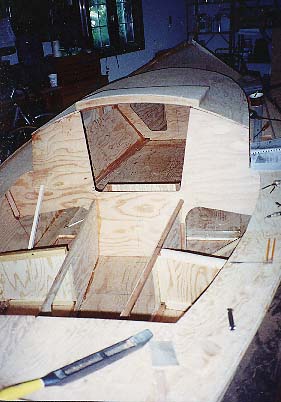
#11 Shot of the cockpit. The brown deck and seat surfaces are non-skid. I used the rubber microballoons added to "brightwork brown" Easypoxy. You can see that I installed screwout deckplates in each corner of the rear deck which made any operation in or around the rear of the boat infinitely easier than it would have been trying to work through the lazarette hatch. I laid up the splash coaming by alternating mahogany and pine (for maximum contrast) and extended them back slightly. In place of the standard cockpit grating, I made mine out of white oak and went for a more linear look. It's difficult to see in this photo, but I made my mast hoops from 5 inch embroidery rings (50 cents each) coated with epoxy which were then attached to the sail with 1 inch stainless steel "key ring" loops. I installed a 12 volt socket in the rear deck which is wired back to the battery in the box in the cabin. I installed the corresponding plug on the trolling motor so that I have a neat way of hooking it up to the battery without a lot of wires in the way.

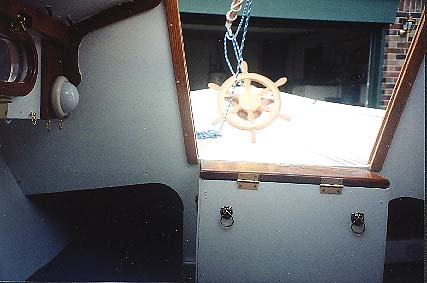
#12. Another view of the cockpit. In this photo you can see the seat hatches which were purchased for about $20 each, also the homemade wheel.
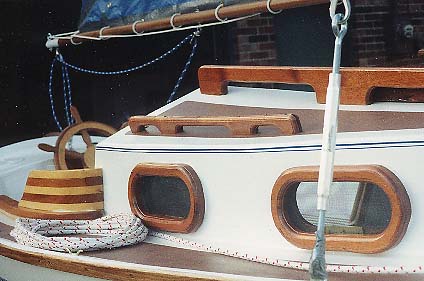
#13. I installed a second smaller grab rail on each side of the cabin roof. With the hatch closed there was not much to grab onto so these seem to be a useful add on. I liked the idea of opening ports so I made the outer rings out of mahogany and installed fiberglass screens in them (barely visible if you look close) The inside rings are seen in another photo.
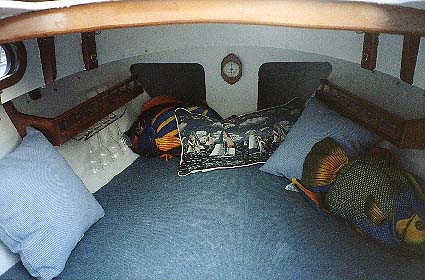
#14. This is a shot of the interior. The bottom of the shelf was a great place for a wine glass rack for my plastic wineglasses. The carpet and fish pillows make for a cozy space! The nautical looking thermometer came from a woodworking store. They carry hygrometers, thermometers and clocks for people who like to make their own and they are a lot cheaper than the ones at the boat stores.

#15 The rear of the boat. I carved the shell boom crutch bracket myself from mahogany. It has a 6 inch wide slot into which slides the boom crutch. I am working on a carved boom crutch which will be a couple of intertwined sea serpents, still not finished though. I'll send you a picture when it's complete. The designs on the sides are standard applique' and you can see the 4 holes for installing the motor mount.
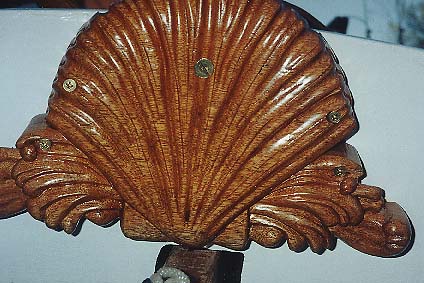
#16. Close-up of the boom crutch bracket.
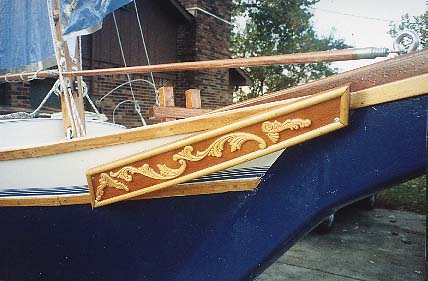
#17. Trailboards. Standard molding and applique' on mahogany.
#18 View from cabin. In this photo you can just see the opening ports They are simply hinged on the bottom and are closed with a standard window sash lock. Works like a charm. I installed lots and lots of hooks and pad eyes every place I could to act as tie down and bungie cord attachments. l also installed two cabin lights of the battery powered type (sold at West Marine for about $7 each). I might eventually install a full 12 volt electrical system with running lights and cabin lights and such but that can wait for another day.
Please feel free to post these pictures or otherwise use them as you see fit. I will try to get some good pictures of the boat on the water and will hopefully have some to forward to you soon.
I have really enjoyed the process of building this boat. Now I look forward to enjoying it even more on the water. I have had many of my neighbors stop by and compliment me on the boat and I look forward to getting it our on the water and showing it off there as well. Take care and happy sailing!-Joe Schoonover

Copyright 2020 Stevenson Projects LLC